Monday, January 20, 2014

CHA 2014 favorite items

As befitting of this show there were lots of bright colors and familiar themes, babies, travel, Project Life.  My favorite overall line would have to be the Essentials line from #StudioCalico simply because of the versatility. Everything from Essentials is a must have.

My favorite alpha sets came from Amy Tangerine for American Crafts in her new Plus One collection. They are fun and different than the other regular fonts, think caligraphy! I also loved that Simple Stories has a new set of their Snap cards (Project Life style cards) with a cat theme that is different than other cat lines I've seen.
I picked more than 5 for my favorite products. For more details please refer to my pinterest page with links to the websites. All images borrowed from their blogs. In no particular order:
 CHA faves Pinterest board

1. Prima from the Bloom collection Chipboard pieces- I love the watercolor style to these stickers.
2 and 4. Websters Papers- Our Travels collection patterned paper and globe charms- This is a wonderful travel line that is soo different than any other travel line I've seen. It is colorful, with a touch of whimsy and yet so useful too. Definitely buying! Just love the adorable globe charms that are also available.
3. Project Life- Overlays- I love these cute overlays that you can just slip into the protector pockets just like a digital brush/stamp. Soo simple and clean.
5. Studio Calico- Essentials line chipboard hearts- From their blog "Stash staples in every color of the rainbow" which is why I will be stocking up on these, they even include woodgrain and gold. The chipboard hearts are my favorite but the other products are also must buy, alpha sticker sets, enamel  dots, chipbaord shapes, clips, sequins, wood veneer and of course cardstock.
6. Lawn Fawn- Let's Polka collection patterened paper-Much like the Studio Calico line this is a versatile line but my favorite part is the patterened paper that is filled with tiny polka dot hearts, SWOON!
7. Simple Stores and Project Life mini albums- Both companies will be introducing 6x8 leather albums in fantastic colors.

Another show come and gone and now we wait for them to hit stores! 
Just wanted to also mention that Heidi Swapp has a new exclusive line that is available now in Michaels everywhere. Hello Today is adorable but the absolute must buy is the planner. It is a great alternative to regular Project Life albums but also great as a companion to remember all those details throughout the year. It has monthly calendar pages and pocket pages throughout. I got one and absolutely love it! I went back 2 days later to snag another one and they were already gone from my store so run don't walk to get yours. She also has coordinating stickers, stamps, cards, mini masks and new mists and inkpads. If your store doesn't have it yet ask when they are. Check our her blog for more details and pics. Heidi's Blog

Thursday, January 9, 2014

CHA 2014 favorites

So first off yes I'm still here but trying to reconnect with the scrapping world. CHA (craft and hobby association) is coming up and we will see all the upcoming scrapbook and craft collections. I've been checking some out and so far there is nothing that is blowing my mind but I'll keep this post updated with my favorite whole collections as I see them and check out my Pinterest board here: CHA faves Pinterest board
I'll let you know my top 5 products by the end of the weekend!

Friday, July 5, 2013

Karl L x Tokidoki Cute video

So I'm not a fashionista but I know who Karl is (super famous fashion designer) and it seems he's teamed up with one of my favorite companies, Tokidoki (Italian designer who makes handbags and accessories). They made an adorable video celebrating the launch of their collaboration and I just adore it. I love the design, the color scheme and it even has a cat so you know I'm all over that aspect. Check it out and Enjoy!

Sunday, April 28, 2013

Circle Mania 2013

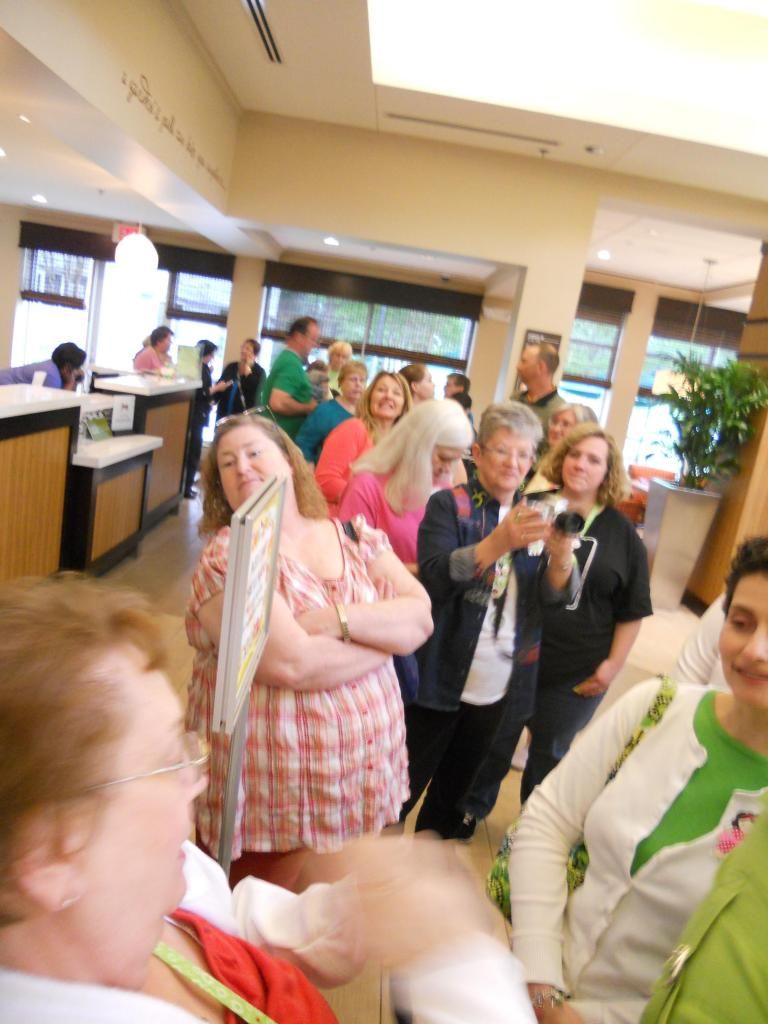
I came back this week from an awesome event put together by a member of the Cricut Circle community, Scrapalette. It was great, from the food to the venue but especially the people! They all made this California girl smile.

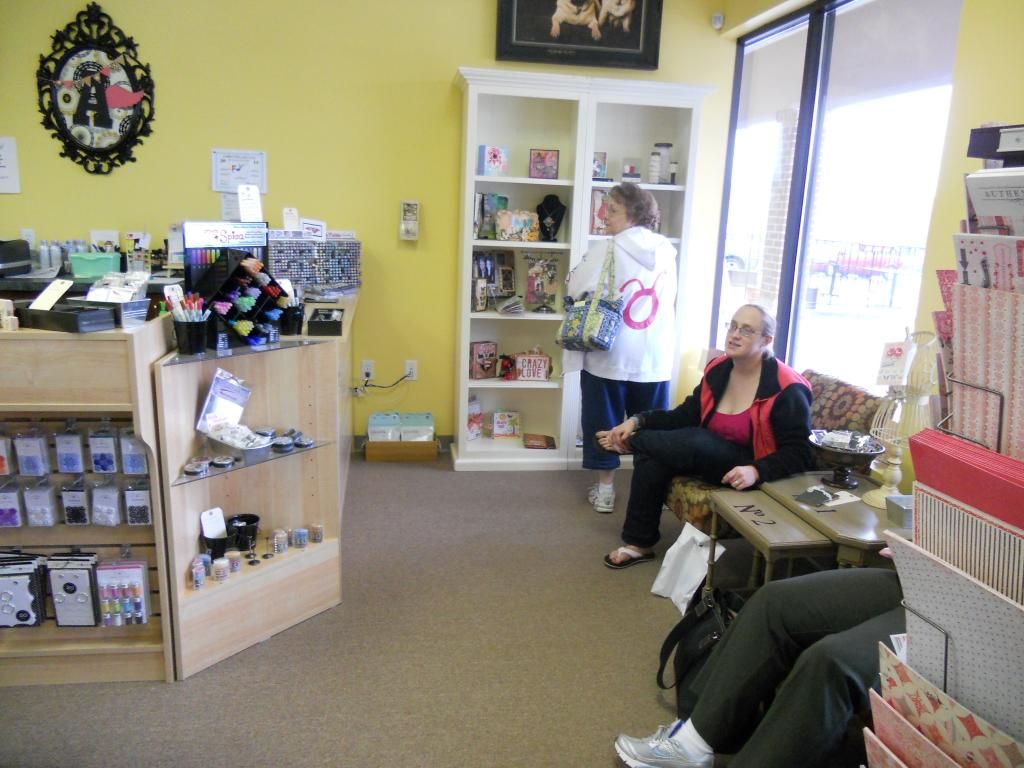
Altered Angels Scrapbook store (friendly and their adorable pugs roam the store helping you to shop)
 
The best Pecan Pie EVER!!!
It was a great weekend of crafting (well watching others craft) shopping (love me some Archivers, please come to California) and laughing. The Hilton Garden Inn in Alpharetta, Georgia was fantastic and helpful. It was fun listening to all the Southern accents and being treated to that famous Southern hospitality. 

Saturday, January 19, 2013

Gossamer Blue Kit Club

If you're looking to join a kit club I have a good one to recommend. Gossamer Blue is a great because of a couple of reasons, great products and prices being the main one. It is no commitment so you can cancel anytime without fees. The monthly price of the kit is about $30 which is the base price of many other kit clubs. I've enjoyed their paper and embellishment selections, my December kit included a lot of SNAP products which were sold out everywhere else.

A unique thing about their club is that each month includes a digital element and if you upload 4 layouts using their kits for 5 straight months they will send you a free album to house the 20 layouts! Neat huh?

I started my kit in December and have been impressed with the speed of my kit shipment and customer service. Another neat feature is that they include a sticker label that features the name of the kit and the colors used for quick reference. Little touches like this impress me a lot.

Find more info at their site here:http://www.gossamerblue.com/
The current Lookbook (sneak peek of upcoming kits) is here: Lookbook

Wednesday, November 21, 2012

Etsy Finds

Haven't done one of these in a while and with Christmas coming up thought I'd start again.

In case you haven't noticed I love "cute". One of my favorite shops is Stephanie Fizer Coleman's TheFoxandTheTeacup
She has some adorable prints and other items and I've even requested custom items from her before. I adore her calendars which are only available this time of year.

Monday, November 19, 2012

December Daily 2012 Ideas and Thoughts

What is December Daily? It is a project started by Ali Edwards that is basically a way to document the Christmas/Holiday season.
Why do it? It's easy to forget the little details that from the holidays since they rush by so fast. Why not capture them and celebrate what makes them special to you?
What if I'm already doing Project Life? Isn't this the same thing?
Not a problem, Project Life is more of a simplified snapshot. December Daily is more of an in depth close up of your holidays.
How do I get started?
*Buy, find, or make an album (after deciding what size you want) then create base pages. 
This could be as simple as sticking cardstock on the page. 
*Buy/gather embellishments. You can go with a theme or coordinating color palette or have a different one everyday. 
*Create Date labels. This could be as elaborate or simple as you want. You need to decide what days you want to document, Ali does the 1st through the 25th. I think it's neat to do the whole month so you can include New Years Eve. Last year I used 2 different stamps. 

It's not necessary to do all this pre-planning but I promise you it is so much easier to keep up with when you do. I suggest to at least do the 1st week. I also suggest buying a notepad/notebook to write down details, ideas, photos you want to use to keep track of your days. Carry it around with you so when inspiration strikes you can jot it down. If you travel or get behind this is an excellent resource.

If you think your life is too boring it's NOT. I've been taking an online class all year that has really taught me that my life is filled with stories, even me a person with no children or spouse. Every life has value and interest. Find Ali's ideas here: http://aliedwards.com/2011/11/december-daily-2011-25-ideas-and-story-inspirations.html

Another spin on this daily December project is Shimelle Laine's (one of the garden girls at Two Peas in a bucket)  Journal Your Christmas project. It is similiar to DD because it helps you document the holidays day by day. However Shimelle's take is through an online class (including forums) that really guides you with daily prompts sent to your email. The prompts include journaling ideas, photo ideas/tips and even downloads. One of the neatest things is once you pay the first year ($35 last year) you are automatically enrolled each additional year for free. About $1 of each enrollment also goes to a charity fund she supports. Find more info here: http://www.shimelle.com/paper/1284/journal-your-christmas-2011-online-scrapbooking-class/ She should be updating it soon with the 2012 info. I highly recommend it because she's a fabulous teacher.

This year I'll be doing a combination of the 2. I love the guidance that Shimelle gives but this year I'd like to try to switch things up which is why I'm calling mine December Daily this time. I'll be doing my own ideas for much of the month but there will be certain days that I will refer to JYC emails. That's the lovely thing about this you can do whatever, however you want! Check  out a couple pages from mine last year!
My cover from last year
You don't need to have a photo on every page
An awesome printable from Shimelle
last year


Pictures don't have to be perfect
Don't be scared to document the "bad parts"


Final Tips
1. Don't be scared of this project, don't feel pressured to make it perfect or to "keep up"
2. Include memoribilia like your Christmas card, a napkin, a Starbucks cofee label or ripped out advertisement you like
3. Have other family members contribute
4. Don't forget to get in the pictures
5. Have fun

Friday, October 19, 2012

Double Slider Stick Pin Box

Hi there, welcome to my little corner of the web! Thank you for joining us in this Halloween blog hop, you should be coming from Liz's blog. You can also start from the beginning with Yolanda.

A few weeks ago I participated in a stick pin swap and wanted to find a fun holder for them. I came across an adorable box on youtube from sscrafter1 that you can find here: Double Slider Box

I received many compliments and decided to document how I did it but make sure to watch the video, she makes it very clear and I don't know about you but I'm a visual person.
I also went ahead and made some printable instructions that go more into detail. Download them here:
Box Instruction Pictures This has a full page of photos
Box instructions
 

In the end you will come out with this!

Measurements:
4" tall, 3" wide, 3/4" deep

Box body -4x10 3/4 patterned cardstock (can be double sided but not required, the middle panel will be the front of the box, panel with tab will be the back)
Inserts- 2 of these-2 3/4 x 3 3/4 cardstock (1 will be seen from top, 1 from bottom, decorate before assembly)
Lid-3x3
Slider-You will need a 1 inch wide strip cut from a plastic shopping bag about 8-9 inches
Additional supplies: double sided tape, liquid glue, hot glue gun, glue sticks, scoring tool,
embellishments , foam or makeup sponge 


Instructions:
1. Score the body at 3", 3 3/4", 6 3/4", 7 1/2", 10 1/2", this will form 3 panels that make up the box.
2.Wrap plastic strip around the panel without the tab lenghwise so it runs from top to bottom, forming a loop, pull tight and use doublesided tape to adhere to each other and not the box.
3. Add at least 2 additional strips of tape to joint and right above. Adhere the 1st insert to this. Add foam or cut up makeup sponge with hot glue to bottom of panel to hold your stick pins.
4. Pull insert to top edge, turn panels around so you are now working on the backside.
5. Add double sided tape to plastic strip and adhere 2nd insert facedown, aligning with bottom edge.
6. Form box, add liquid glue to tab, glue to box so that it rests below insert.


This picture is missing inserts but you can see the tab you will be adding the glue to. Also you can see the lid.
7. Score lid at 1/2", 1 1/4", fold and add glue to bottom and add to box so that lid will close correctly.
8. I decorated with a die cut on front that was glued on halfways so that the lid cut tuck in right behind. In the video she used a velcro dot to close.
8. Your slider should work so that when you pull out the insert on top, the insert will peek out of the bottom at the same time.
Tada! All done.

I embellished by 
-rounding my corners of my lid and added a purple bow
-adding a Close to my Heart stamp spooky sentiment on the lower panel. I also added some stickles in Firefly and bling from my stash.
-edge punched the upper panel along with stapling a strip of orange ribbon so that it's easier to pull
-die cut a cat and fence with bird on top with my Cricut using the Chic n Scary cartridge, added purple bling from stash, stamped bats from Close to my Heart set and then fussy cut, Black Diamond stickles
-punched circle to silhouette cat

Now for some fun! Blog Candy!

Just leave a comment with a way to contact you and I will be handing out a little Halloween kit and also the box I made with the stick pins! Deadline is 9pm Pacific time Sunday, winner announced Monday morning.
GIVEAWAY CLOSED (There were 26 people but 28 comments so I went with the 26 people)
The winner is Tracie!

Your next stop is Wanda's Blog


Don't forget to visit the rest of the blog hop:
1. Yolonda  http://craftyscentiments.blogspot.com/
2. Terri  http://scrappinwiththebug.blogspot.com/
3. Brenda http://happyscrapper64.blogspot.com
4.  Liz   http://lizziesworldofcrafting.blogspot.com
5. Sofia  http://glitternglow.blogspot.com <<<<<<You are here!
6. Wanda  http://greenapplescrapper.blogspot.com/
7.  Becka  http://www.creationswithbecka.blogspot.com/
8.  Tammy  http://www.scrapcavecreations.com/
9. Michele  http://www.michelegreen.com/
10. Betsy   http://betsymcreates.blogspot.com/
11. Tracie  http://www.thecraftytouch.blogspot.com/
12.  Sherry   http://macybella.blogspot.com/
13.  Terri  http://tdycreativegal.blogspot.com/
14.  Amy  www.clearlystamping.blogspot.com

Thursday, October 18, 2012

Quick Tip: Washi Organization

I came to be a washi tape addict last year and have slowly built my collection. However one thing that I was getting confused on was which Washi I had already bought. I took a class with Freckled Fawn and they gave a fantastic tip about adding washi in strips to plain manilla tags and then connecting them with a binder ring. Genius! Now I can use this tool when shopping so I don't double up on a roll (it lasts forever!) and I can use it to refer to when I'm doing layouts.
I need more orange, yellow, pink and purple
FYI: Washi tape for those who don't know is similar to masking tape since it has transparent qualities. You can use it on layouts for embellishing, journaling on or as borders. You can even use it on home decor items.
I buy mine through various places since alot of scrapbooking companies are now making it but here are a couple of  washi "specialty" shops.
Freckled Fawn (highly recommend their red woodgrain tape, it's adorable)
Pretty Tape on etsy
TheWashiShop on etsy

Also don't forget to come back here for a Halloween Blog Hop. I will have Blog candy up for grabs!

Saturday, September 22, 2012

Cricut Circle Crop Checklist

I just noticed that this list was messed up. So once again I have reuploaded it. Please link people back to this post instead of giving them a copy, it took me awhile to figure this out. Yadda yadda yadda. Oh and there is one line with the wrong font but it's 1AM so I'm letting it slide this time.

Thursday, September 6, 2012

Pf Changs LO

So here is a LO I did from a trip I took back in May which I so need to write about. It was the Teresa Collins Inspired Journey Event in Southern California.
Made with a kit from Studio Calico, can't remember which one but I think either the December or January one.

Tuesday, August 21, 2012

Save at Target

Here's a great article on saving money shopping at Target.http://shine.yahoo.com/work-money/save-money-target-210300584.html I get the mobile coupons delivered to my cell so don't worry about forgetting them. I also try to bring my own bags (I forget 1/2 the time) because they give you a 5cent discount on each bag and with the amount that I go (Twice a week 2 bags= 10centsx4weeks= 40 centsx52 weeks= almost $21) it adds up. Every little bit helps!

Thursday, July 26, 2012

Free London 2012 Olympic party Printables

Here are some links to some printables that I found for your Olympic party. I printed out a sheet to include in my Project Life binder also!

Full adorable Go USA party bundle (this is my fav): http://blog.catchmyparty.com/2012/07/24/free-go-team-usa-summer-olympics-party-printables-from-love-party-printables/

Truly adorable kids Olympics set: http://www.tinyme.com/tinyme-games

Simple and quick, this post also includes some great decorating and food ideas: http://www.mirabellecreations.blogspot.com/2012/07/free-printables-and-mirabelle-creations.html

Here's a different spin to this idea (different colors, focus on the cute mascots):
http://www.ucreateparties.com/2012/07/free-printables-olympic-party.html

Cute party favors like medals, cupcake toppers and a medal count scoring sheet:
http://darlingdoodles.blogspot.com/2012/07/olympic-printables.html

And Becky Higgins posted this link on her facebook (which I've been stalking waiting for the new plastics to come in on Amazon) it's a great read from themomcreative website: http://www.themomcreative.com/2012/07/10-ways-to-document-the-olympics-for-project-life.html

If you have time make sure to leave a comment to them since it's so nice of them to share their creativity.

Thursday, July 12, 2012

Recipe Card Swap

Okay late last year a Cricut Circle member posted an ambitious project: a yearlong recipe card swap. She took signups for 10 people to submit 6x6 recipe pages every few months. She would sort and mail them back to us. I signed up as I love collecting recipes and thought it would be fun.

Well we have done 3 recipes so far and it has exceeded my expectations. The ladies are beyond nice and the cards are adorable. I haven't put them into an album yet as I was deciding if I wanted 1 big one or a couple of smaller ones.

Here are my 3 contributions so far:
Appetizer: BBQ bacon spread
Carts used: Block party, Country Life, All Mixed Up, From my Kitchen
Other supplies: stickles, Die Cuts with a view patterened paper, Mister Hueys mist
black cardstock, picnic patterned paper from stash, red pen, red ink

Salad: Jalapeno chicken salad
Carts used: County Life, Old West
Other supplies: Cuttlebug circles folder, October Afternoon and My Minds Eye patterened paper,
Uniball white pen, black pen, Jenni Bowlin tag punch, stickles, clip art, green pearl bling


Main: Deep Pit Beef (pull out recipe card attached to back with washi tape and vellum)
Carts Used: Stand and Deliver, Forever Young, Old West, Block Party, Gypsy Wanderings
Other supplies: Stickles, red glitter ribbon, circle punch, black and blue cardstock, star patterened paper from stash, washi tape from Smashbook

All fonts used downloaded from Lettering Delights, Dafont.com or else preinstalled on computer (PC).

Monday, June 18, 2012

FYI: Jessica Sprague Birthday Celebration

Jessica Sprague is having an amazing celebration to celebrate her website's birthday. She is having a sale and a free class and even a coupon to a print shop. If you have never taken one of her classes you should! She is a fabulous teacher of digital scrapbooking and the community is very helpful.

Info: JS Bday Celebration

Sunday, April 22, 2012

Resort Life LO

Here's a layout I did using a Studio Calico kit. I am currently obsessed with them. This LO features paper from Crate Paper, SC wood veneer alphas, Amy Tangerine sticker border and some buttons and glitter brads from my stash. The pics are from a trip to a resort in the Phillipines! The giant flower was in my stash for years so I was happy to finally use it but it could also be cut out using a die cut machine and just ruffling the edges a bit. I love this LO because it makes me excited for summer.

Sunday, April 1, 2012

Buy Insurance!

Last year my computer died and I lost a number of files and had to pay a couple hundred just to fix it. It was horrible but reminded me to do backups of my computer alot more often. It was an expensive lesson and I thought nothing could be as bad as that. I was wrong.
Last week I lost my phone. (Or had it stolen I never was able to figure out exactly which.) I have now been without a phone for a week and have just learned that I can pay $500 for a new phone, wait and buy one for slightly less in 2 weeks or take my chance and buy one off ebay. None are great choices.

 As a result I have some pointers/warnings for you.

1. Buy insurance-It would have saved me alot of money and they seem more willing to help when you have it.
2. Install a finders application on your cell. It is basically a program where you can find your phone when lost and in some cases wipe out the information if stolen. If your phone is turned off though it doesn't really do alot.
3. As soon as you've determined that you are not getting your phone back call your provider so that you can suspend your service and not be charged for any calls that others may make. Remember to try calling it first though.
4. Make sure that you have a pin lock on it. I was lazy and didn't so all I had to do to unlock it was swipe the lock open. If you have a pin lock then you also have to punch in your personal pin number. My information was accessible so if my phone was stolen they could get into my text messages, my email, my contacts and my photos. This is the part that made me particularly sick when I realized it was lost/stolen. It might be a pain to have to enter your pin but it will save you a world of hurt!
5. In either case (if you have a pin set up or not) I suggest trying to remember what apps you had on your phone and changing all the passwords. I don't do banking from my phone so didn't have to worry about that! I did change my email and 2 other services I subscribed to though. Just in case.
6. Lastly once again BACKUP YOUR INFO! Some of the previous finders apps do it automatically while some providers will also do it. I lost some great photos that I was waiting to email myself. Lesson learned...again.

So say a prayer for me and take a couple of minutes to take care of your phone. I'm not an avid cell phone user like some but now that I'm without one I do feel very lost and out of the loop. Oh well, only for a few more weeks hopefully.

Wednesday, February 22, 2012

Just Because

I apologize for the lack of posts. Work has just taken over! I thought I'd leave a pic of something I saw in an alley last December. It made me smile to think of someone writing it. Have a great day full of love.

Saturday, January 21, 2012

Make Your own Scrapbook Kit

Here's an excellent article on making your own Scrapbooking Page Kit for when you head to a crop.
Debbie Hodge Make Your Own Kit
Don't forget I have a Crop Packing List for everything else you may need in the Printables section of my blog.

Friday, January 20, 2012

Your Handwriting into a Font

Have you ever wanted to get your handwriting made into a font to download onto your computer? How about for only $10? At the Lilypad this is now an option!
Click here to go to Handwritten Font page
There are 2 options, 1 where you allow your personal font to be sold and redistributed by the designer for $10, 1 where you are the only one who will ever get to use your font for $20. How cool is that?
This weekend they are also having a 30% off sale (does not apply to handwritten font product).
Lilypad digital store